 |
Registering New Users with MainBoss
|
This help file applies to an out-of-date version of MainBoss.
The most recent version of MainBoss is MainBoss 4.2.4.
This help file does not exist in MainBoss 4.2.4, but the index for that version can be found here.
< Previous section | Table of Contents | Index | Next section >
To access the MainBoss database, a user must be authorized by the instance of SQL Server that manages the database. There are two possible types of authorization:
- Windows Authentication means that the user's Windows login name appears in SQL Server's list of recognized login names
- Otherwise, users can identify themselves with a special SQL Server name and password. This name is separate from the person's Windows login name. Some organizations use separate SQL Server names if several people use the same login name and/or SQL Server name. (Sharing names between multiple people is a potential security problem and is not recommended.)
When you authorize a new user to access the MainBoss database, MainBoss attempts to set up appropriate permissions for the access. In order for this to happen, you must have administration privileges on the instance of SQL Server that manages the MainBoss database. Start MainBoss, then follow these steps:
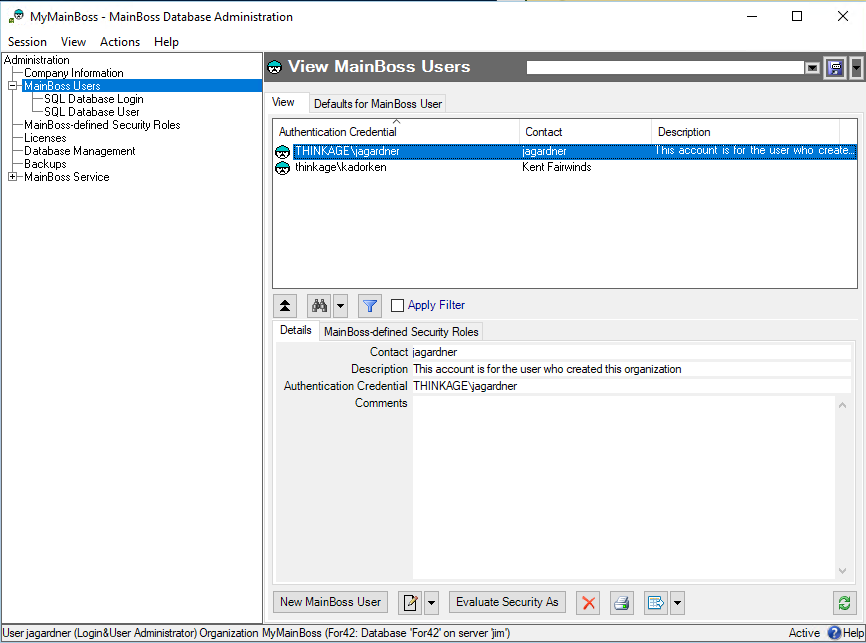
- In the MainBoss control panel, go to Administration | Users:
- Click New MainBoss User. This opens a window where you can specify other users who can use the database.
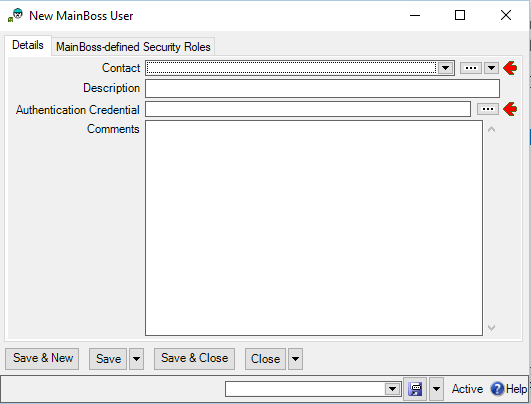
- On the "Contact" line, click the second drop-down arrow. From the resulting menu, click .
- Fill in contact information for the user whose record you are creating. When you're done, click Save & Close to save the contact information and close the window.
- Back in the user record, click the "..." button associated with "Authentication Credential". This opens a window that displays the people currently authorized to access databases in the instance of SQL Server that manages the MainBoss database:
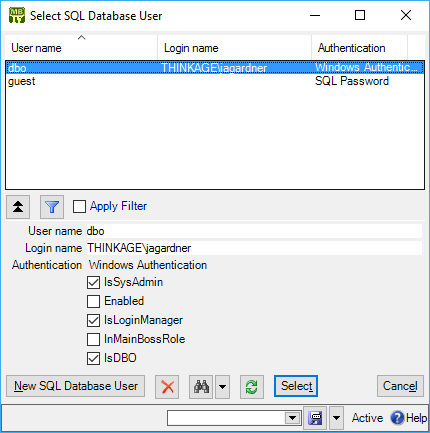
- If you user you want to authorize already has an entry in this list, click the user's name and then click Select. You can then go on to Step 14 below.
Otherwise, click New SQL Database User. This opens a window of the following form:
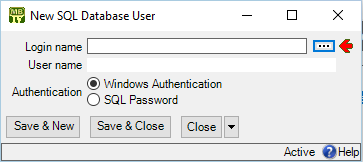
- If the person will access the database under a normal Windows login name, click Windows Authentication, then click the "..." button after "Login name".
If the user will access the database under a special SQL Server name and password, click SQL Password and enter the password in "Password". Then click the "..." button after "Login name".
In either case, MainBoss will open a window where you can specify the login name:
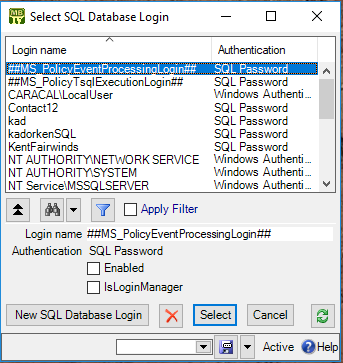
- If the user's login name appears in the list, click the name, then click Select. You will return to the previous window. Fill in any information that still needs to be entered, then click Save & Close. Continue with Step 12 below.
Otherwise, you have to create a new login entry for the person. Click New SQL Database Login. This opens a window with the following form:
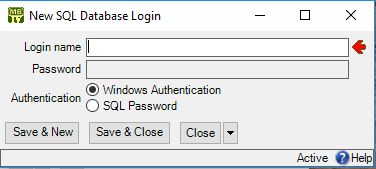
- If the new user will be identified with a normal Windows login name, click Windows Authentication and enter the name in "Login Name". Otherwise, click SQL Password, and enter a suitable name and password into "Login name" and "Password". (For SQL Password, the login name must be different from other names in the SQL Server list of logins. The user will be asked for the name and password whenever they start using MainBoss.)
- Click Save & Close to return to the previous window.
- Click the Refresh operation to get the new entry to appear, then select it and click Select to select the new entry in the list of logins.
- The SQL Database User name will match the Login name. Click Save & Close to save the new SQL Database user record.
- Click the Refresh operation to get the new SQL Database User to appear in the list. Select and Click a name in the list of possible SQL users, then click Select.
- Back in the user record, click Save & New.
- Repeat Steps 3-7 for each person who'll be using MainBoss. Click Close or Save & Close to return to the previous window. The window will show the users you have authorized.
Your MainBoss license restricts how many entries there may be in the Users table.
In order to add new users within MainBoss, you must have the MainBoss Administration security role, or else you must have Windows Administrator privileges and start MainBoss with "Run as administrator".
If you delete a user from the Users table and later wish to restore the same user, just double-click the word Active in the bottom right-hand corner of Administration | Users. This will show all the deleted users as well as the active ones. Click on the entry for the user you wish to restore, then click the drop-down button beside View and click Restore.
< Previous section | Table of Contents | Index | Next section >